Recently, I had the opportunity to visit Healthy Habits Kitchen in Wellesley. Healthy Habits is a small business that operates as a meal prep kitchen where busy families can come and put together, or just choose, meals that are guaranteed to be cooked in 30 minutes or less. All meals are designed to be less than 400 calories a serving; sides excluded, and are verified by a resident nutritionist.
I had heard about businesses like Healthy Habits before, specifically, Dream Dinners, but have never actually participated in the programs. Personally, I could never justify the cost for a meal, when I would only be cooking for two people. Healthy Habits has very reasonably priced meals though, which quite frankly, was surprising given the ingredients they use. They use produce from local farmers, and meats that contain no antibiotics, hormones, etc.
When visiting HHK, the owner spoke about the origin of the business, why she thought it would work, and most importantly how they captivate and keep regular customers. After her talk, I was hooked! I think it's a fabulous idea to have the option of having a home cooked meal, with all of the tedious slicing, dicing, and marinating already complete for you.
Let's get on to the good stuff though- the food! Healthy Habits fed a group of us a meal that they would have on a menu for folks to purchase on a regular basis. We tried root beer float pork, salsa chicken, quinoa salad, and dark cherry chocolate cookies. I was pretty skeptical, but after trying all of the food, I was impressed! It was all very tasty, and my favorite was actually the quinoa salad. I think it was the vinaigrette and veggies that really sold me.
I left HHK with a meal of turkey pumpkin chili to make when I had a chance. I have not tried it yet, but am anxiously waiting! The beauty of all of the foods that HHK sells is that they are all prepackaged in boxes that can immediately be put into the freezer.
I highly recommend Healthy Habits Kitchen for busy families, or anyone for that matter!
10.09.2011


9.30.2011
Pickles!
Between weekend travels, house decorating, and loads of work, I somehow tried to squeeze in some last of summer pickling. I happen to have a special place in my heart for dill pickles. They were a constant in my home growing up as my brother LOVED pickles as much as a dog loves bones. So, by default, I had them a lot too.
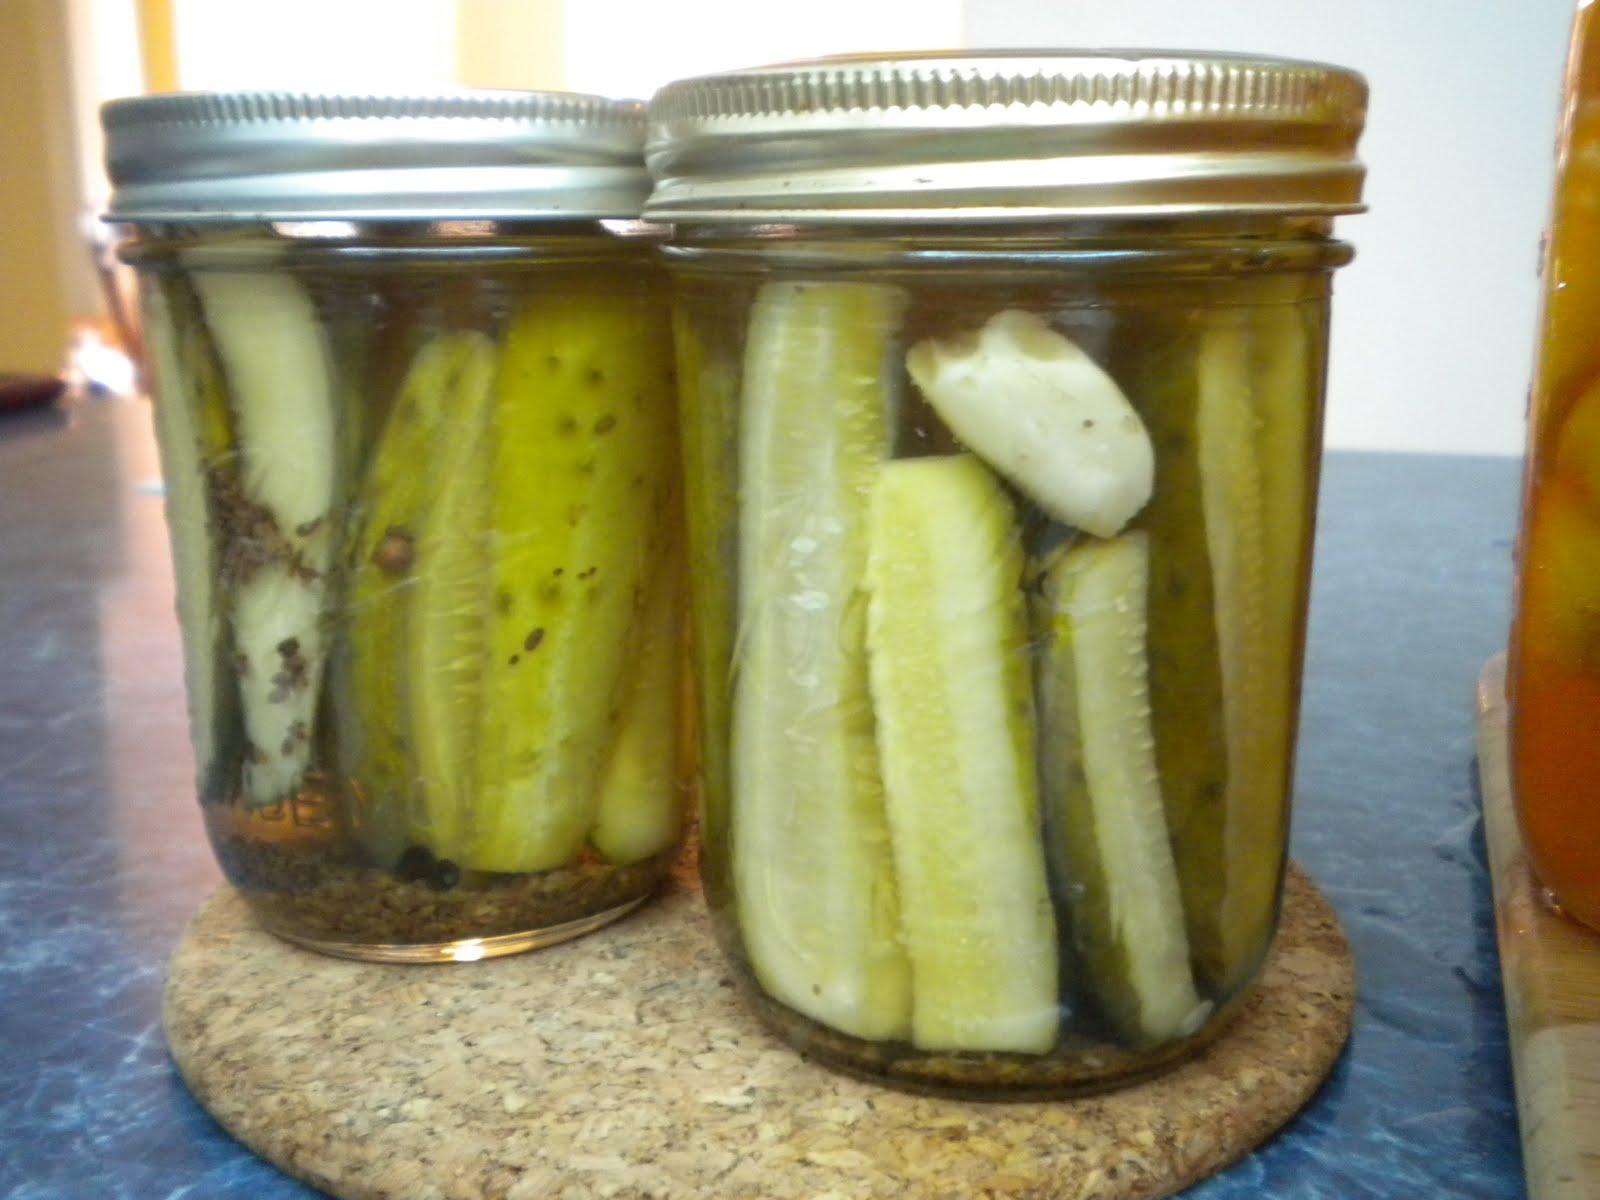
This year I decided to give pickling some cucumbers a go. I did not realize that it was so simple to pull together, and quite honestly, it took about 15 minutes hands on time! That's my type of canning! I will most certainly be pickling more next summer as it is really easy, and maybe I'll even try sweet pickles, as Jack likes them.

I have not tried my pickles yet, but if they are anything like all of the other recipes in Put 'Em Up by Sherri Brooks Vinton, then I have no doubt they will be tasty. If you are a newbie to home canning, this is a terrific book to have. I love it because the recipes are all super simple, and are more current than those in the Ball Canning Book. Try it out!
Dill Pickles from Put 'Em Up
Ingredients
5 lbs cucumbers, ends removed, and cut into spears that will fit into the jars you are using
1/2 c salt
2 c of ice cubes
4 c distilled white vinegar
2 c water
2 tbsp sugar
8 garlic cloves, peeled
2 tbsp dill seed (or use fresh dill, which I did)
1 tsp celery seed
1 tsp peppercorns
Instructions
1. Layer the cut cucumbers with salt in a large bowl and cover with ice cubes. Set aside for at least 2 hours. Drain rince, and pack into already hot jars. I suggest to start boiling your jars at the 1.5 hour mark. This way your jars will be hot just as your cucumbers will be done draining.
2. Combine the vinegar, water, sugar, garlic, dill seed (or fresh dill), celery seed, and peppercorns in a medium nonreactive saucepan, and bring to a boil. When at boiling stage, pour the brine over the spears which are in the jars already. Leave about 1/2 inch of headspace at the top of the jar.
3. To can using the boiling water method, release the trapped air, wipe the rims clean, and put the lids and screw bands on the jar. Process in the boiling water for 10 minutes. Turn off the heat source, remove the canner lid, and let the jars rest in the water for 5-10 more minutes. Remove the jars from the water and let sit, undistrubed for 24 hours. Check the seals and then store in cool, dark place for up to a year.
9.04.2011
Canning Craze
With summer on its last legs, I have been trying to save away the best of it by canning loads of fresh veggies. You'll have to forgive my absence, as most weekends have been spent blanching, chopping, and stewing tomatoes, pickles, and peaches. This of course, is not to say I mind spending time now in the kitchen so as to save for later, rather, I do enjoy it, but it just gets Hot, Hot, and more Hot! The only thought that helps me get through it, is knowing that come January, I will have fresh peaches and tomatoes whenever my heart desires.
This year, I tried a few new recipes, including canned pizza sauce and peach butter. The pizza sauce was incredibly time consuming, but I believe it will be totally worth it as it will save both time and money later in the year and early next. The reasoning for the lengthy recipe time was really the de-seeding and de-juicing of the tomatoes. Who knew tomatoes had so much liquid and seeds?!
 Canned peaches for winter eating
While the pizza sauce was extremely tasty, what I really want to share is the recipe and method for making peach butter. I was inspired to make it when my best friend gave me a jar of it from Lancaster County (PA), and then Jack unfortunately dropped the jar and broke it before I even had a chance to try it! I decided that it looked and smelled tasty enough to give it a try, and I am very glad that I did.

The beauty of this recipe is that you can actually use peach "seconds," or those peaches that might have a small blemish or hole which would otherwise be unappetizing. I purchased a 20lb basket of peaches, and used some of it to make the fruit butter. The first step is the blanch the peaches to rid of the skin. Next, dice peaches and put into a non-reactive pot along with a variety of spices. Lastly, you will need to use a stick blender or potato masher to rid of any remaining chunks, and then process in clean cans.
Fortunately, this recipe can be scaled down if you would like, and none of it has to be canned at all. You can make a few jars to just store in your refrigerator, however, it will only last about 6 months at most.

Peach butter, while a little time consuming, is a great way to put away fresh peach flavor for a cold, snowy day. The butter certainly gives you a taste of summer on a piece of toast. I highly recommend making it, if you can score some peaches!
Peach Butter
from Ball "Complete Book of Home Preserving"
4.5 lbs peaches- peeled, pitted, and coarsely chopped
1/2 c water
Grated zest and juice of 1 lemon
4 c sugar
1. In a large stainless steel saucepan, combine peaches, water, lemon zest, and juice. Bring to boil over medium high heat. Reduce heat and boil gently, stirring occasionally, until peaches are soft- about 20-25 minutes
2. Using stick blender, puree peaches, but do not liquefy. Measure 8 cups of peach puree.
3. In a clean saucepan, combine peach puree and sugar. Stir until the sugar dissolves. Bring to a boil over med-high heat, stirring frequently. Be careful not to burn or scorch. Reduce the heat, and boil gently, stirring often, until the mixture thickens and holds its shape on a spoon.
4. If canning, prepare the canner, jars, and lids. If not, put into jars and let sit out to cool. Put in refrigerator when cool. Store for up to 6 months.
5. When jars and lids are ready, ladle the hot butter into the hot jars, leaving 1/4 inch of head space. Wipe the rim, center the lid on the jar, and screw the band tight.
6. Place jars in canner, and make sure they are covered with water. Bring to a boil and process for 10 minutes. Remove the canner/pot lid and let stand for 5 minutes. Remove jars and then cool and store.
This year, I tried a few new recipes, including canned pizza sauce and peach butter. The pizza sauce was incredibly time consuming, but I believe it will be totally worth it as it will save both time and money later in the year and early next. The reasoning for the lengthy recipe time was really the de-seeding and de-juicing of the tomatoes. Who knew tomatoes had so much liquid and seeds?!
 Canned peaches for winter eating
While the pizza sauce was extremely tasty, what I really want to share is the recipe and method for making peach butter. I was inspired to make it when my best friend gave me a jar of it from Lancaster County (PA), and then Jack unfortunately dropped the jar and broke it before I even had a chance to try it! I decided that it looked and smelled tasty enough to give it a try, and I am very glad that I did.

The beauty of this recipe is that you can actually use peach "seconds," or those peaches that might have a small blemish or hole which would otherwise be unappetizing. I purchased a 20lb basket of peaches, and used some of it to make the fruit butter. The first step is the blanch the peaches to rid of the skin. Next, dice peaches and put into a non-reactive pot along with a variety of spices. Lastly, you will need to use a stick blender or potato masher to rid of any remaining chunks, and then process in clean cans.
Fortunately, this recipe can be scaled down if you would like, and none of it has to be canned at all. You can make a few jars to just store in your refrigerator, however, it will only last about 6 months at most.

Peach butter, while a little time consuming, is a great way to put away fresh peach flavor for a cold, snowy day. The butter certainly gives you a taste of summer on a piece of toast. I highly recommend making it, if you can score some peaches!
Peach Butter
from Ball "Complete Book of Home Preserving"
4.5 lbs peaches- peeled, pitted, and coarsely chopped
1/2 c water
Grated zest and juice of 1 lemon
4 c sugar
1. In a large stainless steel saucepan, combine peaches, water, lemon zest, and juice. Bring to boil over medium high heat. Reduce heat and boil gently, stirring occasionally, until peaches are soft- about 20-25 minutes
2. Using stick blender, puree peaches, but do not liquefy. Measure 8 cups of peach puree.
3. In a clean saucepan, combine peach puree and sugar. Stir until the sugar dissolves. Bring to a boil over med-high heat, stirring frequently. Be careful not to burn or scorch. Reduce the heat, and boil gently, stirring often, until the mixture thickens and holds its shape on a spoon.
4. If canning, prepare the canner, jars, and lids. If not, put into jars and let sit out to cool. Put in refrigerator when cool. Store for up to 6 months.
5. When jars and lids are ready, ladle the hot butter into the hot jars, leaving 1/4 inch of head space. Wipe the rim, center the lid on the jar, and screw the band tight.
6. Place jars in canner, and make sure they are covered with water. Bring to a boil and process for 10 minutes. Remove the canner/pot lid and let stand for 5 minutes. Remove jars and then cool and store.
8.14.2011
Homemade Celery Salt and a Pyrex Scare
Heidi from 101 Cookbooks recently posted a recipe on how to make homemade celery salt, and it certainly intrigued me. While celery salt is not a spice that I tend to reach for on a regular or even semi regular basis, I thought that it could become part of my repitoire, specifically on my morning eggs. The trouble with the recipe though, was finding celery that still had leaves intact.


Fortunately for me, Allandale Farm had homegrown celery at their farmer's market stand in Roslindale last weekend-I was in luck! Later that week I finally had a chance to make the spice, and it sure was easy! All that was involved was chopping the leaves off of the celery stalk, and then spreading the leaves on baking sheet and baking for 5 minutes. Lastly, the leaves need to be crumbled and then an equal amount of salt should be added to the dried celery leaves, which then completes the spice. After a quick shake together, you have a homemade spice!

I have used the celery salt on scrambled eggs, salad, and bread. I definitely have a new appreciation for celery salt, and will be trying to make other spices soon.


On a totally separate note, I wanted to talk about a terrible and scary experience that I had this morning while making bread. I was trying out a recipe from my new book, "Aritsan Bread in 5 Minutes a Day," which asked that you put water into a dish that was sitting in an already preheated oven. The book did mention to use the broiler pan, however, I do not have one, so I used a Pyrex dish. When I started pouring the water into the already hot dish, the dish exploded in the oven! Fortunately, no one was hurt, and the bread was still intact, but I now will not be using Pyrex in the future.
Apparently, after I conducted some research, I found that Pyrex cannot be subjected to extreme temperature changes, or else it will explode. This began occurring when the company was sold, and the manufacturing of the products was outsourced. The manufacturer switched to a cheaper raw material, which is when all of the instances of exploding Pyrex dishes started to occur.
I wanted to tell everyone this so that extra care and precaution is taken when using Pyrex dishes. I hope this does not happen to you!


Fortunately for me, Allandale Farm had homegrown celery at their farmer's market stand in Roslindale last weekend-I was in luck! Later that week I finally had a chance to make the spice, and it sure was easy! All that was involved was chopping the leaves off of the celery stalk, and then spreading the leaves on baking sheet and baking for 5 minutes. Lastly, the leaves need to be crumbled and then an equal amount of salt should be added to the dried celery leaves, which then completes the spice. After a quick shake together, you have a homemade spice!

I have used the celery salt on scrambled eggs, salad, and bread. I definitely have a new appreciation for celery salt, and will be trying to make other spices soon.


On a totally separate note, I wanted to talk about a terrible and scary experience that I had this morning while making bread. I was trying out a recipe from my new book, "Aritsan Bread in 5 Minutes a Day," which asked that you put water into a dish that was sitting in an already preheated oven. The book did mention to use the broiler pan, however, I do not have one, so I used a Pyrex dish. When I started pouring the water into the already hot dish, the dish exploded in the oven! Fortunately, no one was hurt, and the bread was still intact, but I now will not be using Pyrex in the future.
Apparently, after I conducted some research, I found that Pyrex cannot be subjected to extreme temperature changes, or else it will explode. This began occurring when the company was sold, and the manufacturing of the products was outsourced. The manufacturer switched to a cheaper raw material, which is when all of the instances of exploding Pyrex dishes started to occur.
I wanted to tell everyone this so that extra care and precaution is taken when using Pyrex dishes. I hope this does not happen to you!
8.07.2011
Grilled Panzanella
Summer is certainly flying by, and it seems to be even quicker this year! It is already tomato and eggplant season, and I can already smell the onset of fall in the early mornings. Before fall arrives though, I am trying to utilize loads of new recipes involving late summer's bounty, and more specifically, our garden's bounty.

While perusing through one of my many monthly cooking magazines, bon appetit, I stumbled across Grilled Panzanella and thought it would really be a perfect summer dinner, especially when it gets too hot to really cook at all. As tomatoes are in season, and I had a few extra summer squash hanging around in the crisper, I decided to incorporate these two items along with some basil paste in a lovely salad with some delicious garlic bread.

If you have not read August's bon appetit, I suggest you pick it up soon as it has loads of recipes that incorporate summer veggies and fruits. I have many page flagged down in it, as all of the recipes look very tasty, and more importantly, simple.
How have you been using summer veggies? Any suggestions to try?

Grilled Panzanella
adapted from bon appetit, August 2011
1.5 cups fresh basil leaves, divided
2/3c plus 2 Tbsp EVOO, divided
1 large shallot, thinly sliced (I used green onion)
1 small red jalapeno, seeded and finely chopped
2 tsp grated lemon zest
2 Tbsp fresh lemon juice
S&P
3 lbs ripe tomatoes, various varieties
1 12oz rustic bread
1 garlic clove, halved
Puree 3/4c basil leaves and 1/3c plus 2 Tbsp oil in blender until smooth. Set a strainer over a large bowl. Strain mixture into bowl, pressing on solids to extract as much oil as possible. Discard the solids left in the strainer. Add shallot, chile, lemon zest, and lemon juice to the basil oil. Whisk to blend and season to taste with S&P.
Slice tomatoes into assorted wedges, rounds and cubes. Add to the bowl with the dressing and toss to coat. Let marinate for at least 30 minutes.
Meanwhile, preheat a gas grill to high or if doing inside, your broiler to high. Brush the bread with remaining 1/3c EVOO, season with S&P, and grill/broil until charred ins pots. Rub grilled bread with cut sides of the garlic clove, and then tear into bite sized pieces.
Add bread and remaining 3/4c basil leaves to bowl with the tomato mixture and toss to coat. Season the panzanella to taste with S&P and serve.

While perusing through one of my many monthly cooking magazines, bon appetit, I stumbled across Grilled Panzanella and thought it would really be a perfect summer dinner, especially when it gets too hot to really cook at all. As tomatoes are in season, and I had a few extra summer squash hanging around in the crisper, I decided to incorporate these two items along with some basil paste in a lovely salad with some delicious garlic bread.

If you have not read August's bon appetit, I suggest you pick it up soon as it has loads of recipes that incorporate summer veggies and fruits. I have many page flagged down in it, as all of the recipes look very tasty, and more importantly, simple.
How have you been using summer veggies? Any suggestions to try?

Grilled Panzanella
adapted from bon appetit, August 2011
1.5 cups fresh basil leaves, divided
2/3c plus 2 Tbsp EVOO, divided
1 large shallot, thinly sliced (I used green onion)
1 small red jalapeno, seeded and finely chopped
2 tsp grated lemon zest
2 Tbsp fresh lemon juice
S&P
3 lbs ripe tomatoes, various varieties
1 12oz rustic bread
1 garlic clove, halved
Puree 3/4c basil leaves and 1/3c plus 2 Tbsp oil in blender until smooth. Set a strainer over a large bowl. Strain mixture into bowl, pressing on solids to extract as much oil as possible. Discard the solids left in the strainer. Add shallot, chile, lemon zest, and lemon juice to the basil oil. Whisk to blend and season to taste with S&P.
Slice tomatoes into assorted wedges, rounds and cubes. Add to the bowl with the dressing and toss to coat. Let marinate for at least 30 minutes.
Meanwhile, preheat a gas grill to high or if doing inside, your broiler to high. Brush the bread with remaining 1/3c EVOO, season with S&P, and grill/broil until charred ins pots. Rub grilled bread with cut sides of the garlic clove, and then tear into bite sized pieces.
Add bread and remaining 3/4c basil leaves to bowl with the tomato mixture and toss to coat. Season the panzanella to taste with S&P and serve.
6.29.2011
Homemade Ricotta Cheese
As part of my Christmas present last year, Jack so graciously gave to me (and him!), cheese making classes with none other than the Cheese Queen herself, Ricki Carroll. The gift involved a 6 hour class at Ricki's beautiful and eclectic home in Western Mass. We started with making a farmer's cheese, which we unfortunately did not get to taste. However, throughout the day, we sampled various types of yogurt, two types of ricotta cheese, queso blanco, and her beloved 30 minute mozzarella.

If you have never made cheese, the task itself can seem quite daunting, however, after watching Ricki work her magic, the craft of cheese making seems much easier than originally thought. After leaving class, and picking up numerous supplies, Jack and I set out to find "good" milk. Good milk is defined as milk that has been pasteurized at a temperature that is less than 180 degrees F. Believe it or not, finding milk that has been pasteurized at less than 180 degrees is extremely difficult, even at Whole Foods. We tested out a few brands, and decided that either Sky Top Farms or High Lawn Farms milk are the best available at our grocery stores. It should be noted that there are a few local dairies near Boston that will deliver to your door that more than likely have good milk, however I have yet to try them out.

I have to admit that Jack was the first of us to try to make cheese. He successfully made both mozzarella and queso blanco cheese, and they both tasted terrific! I finally took decided to try to make ricotta cheese, as it was both simple to make and easy to use in so many recipes.

The method for making ricotta cheese is fairly simple. Bring a mixture of milk and citric acid to a temperature of 190 degrees, make sure the milk starts to separate from the whey, and turn off the stove and let the mixture sit for 5 minutes. After the resting period, drain the mixture into a cheesecloth lined strainer. Gather the cheesecloth and tie into a knot and let hang to drip for at least 30 minutes, and up to overnight. See, it's simple!

I used the ricotta cheese in a Zucchini and Ricotta cheese galette. I have to admit, it certainly took a plain old galette to the next level. The homemade cheese really makes a difference in the taste of all of the foods that it is used in.
Here is the link to Ricki's website, which also includes the recipe for Ricotta cheese, amongst many others.


If you have never made cheese, the task itself can seem quite daunting, however, after watching Ricki work her magic, the craft of cheese making seems much easier than originally thought. After leaving class, and picking up numerous supplies, Jack and I set out to find "good" milk. Good milk is defined as milk that has been pasteurized at a temperature that is less than 180 degrees F. Believe it or not, finding milk that has been pasteurized at less than 180 degrees is extremely difficult, even at Whole Foods. We tested out a few brands, and decided that either Sky Top Farms or High Lawn Farms milk are the best available at our grocery stores. It should be noted that there are a few local dairies near Boston that will deliver to your door that more than likely have good milk, however I have yet to try them out.

I have to admit that Jack was the first of us to try to make cheese. He successfully made both mozzarella and queso blanco cheese, and they both tasted terrific! I finally took decided to try to make ricotta cheese, as it was both simple to make and easy to use in so many recipes.

The method for making ricotta cheese is fairly simple. Bring a mixture of milk and citric acid to a temperature of 190 degrees, make sure the milk starts to separate from the whey, and turn off the stove and let the mixture sit for 5 minutes. After the resting period, drain the mixture into a cheesecloth lined strainer. Gather the cheesecloth and tie into a knot and let hang to drip for at least 30 minutes, and up to overnight. See, it's simple!

I used the ricotta cheese in a Zucchini and Ricotta cheese galette. I have to admit, it certainly took a plain old galette to the next level. The homemade cheese really makes a difference in the taste of all of the foods that it is used in.
Here is the link to Ricki's website, which also includes the recipe for Ricotta cheese, amongst many others.

6.22.2011
Julia Child's Potato Salad
I have always disliked potato salad. Much like the case with pasta salad, which is typically drenched in some sort of condiment, potato salad most always has loads of mayonnaise, which I despise! Recently, when reading through my new issue of Vegetarian magazine, I stumbled upon a recipe for potato salad that did not contain mayo. Seeing this led me to think that there had to be other recipes for potato salad that did not contain mayo.

Fortunately for me, a quick google search led me to a recipe by one of my favorite chefs, Julia Child. I would have never thought that the queen of butter would have a lower fat and non mayo containing version of a delicious summertime treat! After a quick review of the recipe, I realized that this particular recipe would be one that I would use time and time again.

Red potatoes are cooked for about twenty minutes, and then let to cool off until able to handle with your hands. After a little slicing and dicing, the potatoes are drizzled with some EVOO, white wine vinegar, parsley and S&P amongst other items. The end result is a refreshing, light and mayo free salad! I highly recommend making this version of potato salad, and especially recommend eating it a day after making so that all of the flavors have a chance to meld together.


French Potato Salad
from "Mastering the Art of French Cooking"
Ingredients
1 1/2 pounds red potatoes
2 Tbs shallots or scallions, finely minced
Salt
White pepper, freshly ground
1/4 cup dry white wine
1 1/2 Tbs white wine vinegar
2 to 3 Tbs fresh parsley, chopped
2 to 3 Tbs light olive oil, optional
Directions
Fill a three-quart saucepan half full with cold water.
Wash the potatoes and drop into pot full of water. Cook in simmering water for about 20 minutes. Drain and set in a bowl to cool enough until able to touch. Slice the cooled potatoes, and then toss with scallions, S&P, white wine, vinegar, and olive oil. Sprinkle on parsley to garnish. Allow salad to rest 30 minutes to give the dressing time to be absorbed by the potatoes. The salad is best the next day.

Fortunately for me, a quick google search led me to a recipe by one of my favorite chefs, Julia Child. I would have never thought that the queen of butter would have a lower fat and non mayo containing version of a delicious summertime treat! After a quick review of the recipe, I realized that this particular recipe would be one that I would use time and time again.

Red potatoes are cooked for about twenty minutes, and then let to cool off until able to handle with your hands. After a little slicing and dicing, the potatoes are drizzled with some EVOO, white wine vinegar, parsley and S&P amongst other items. The end result is a refreshing, light and mayo free salad! I highly recommend making this version of potato salad, and especially recommend eating it a day after making so that all of the flavors have a chance to meld together.


French Potato Salad
from "Mastering the Art of French Cooking"
Ingredients
1 1/2 pounds red potatoes
2 Tbs shallots or scallions, finely minced
Salt
White pepper, freshly ground
1/4 cup dry white wine
1 1/2 Tbs white wine vinegar
2 to 3 Tbs fresh parsley, chopped
2 to 3 Tbs light olive oil, optional
Directions
Fill a three-quart saucepan half full with cold water.
Wash the potatoes and drop into pot full of water. Cook in simmering water for about 20 minutes. Drain and set in a bowl to cool enough until able to touch. Slice the cooled potatoes, and then toss with scallions, S&P, white wine, vinegar, and olive oil. Sprinkle on parsley to garnish. Allow salad to rest 30 minutes to give the dressing time to be absorbed by the potatoes. The salad is best the next day.
Subscribe to:
Posts (Atom)