1.28.2013

Roasted Red Peppers

These chilly days and nights in New England have certainly put stop to my desire to venture outside as much as I had done in the warmer weather. Bundling up in layers and boots and hats and scarves may sound romantic in the summer months, but when you're in the thick of snowstorms and single digit weather, I promise that it is not even romantic in the least bit.


Staying inside more has its good side though, and for me it often includes more reading, cooking and time relaxing. The crossroads of this brings me to a recipe and inspiration for Roasted Red Peppers. Last week I finally was able to take My Berlin Kitchen by Luisa Weiss out from my local library. A series of single digit days allowed me the chance to breeze through her incredibly thoughtful and delicious book and led to me wanting to make every single recipe in her book pronto. I read about her grandmother's recipe for Roasted Red Peppers in the book a few times, but found that the recipe was not actually included in her book. Thankfully, she had blogged about it on her beautiful site, The Wednesday Chef.


Armed with a lot of time on a dreary night, I proceeded to make these beauties, and boy am I glad that I did. The peppers melt down with all of the longer roasting time into sweet and soft vegetables that are so tasty alone or in salads and omelets. This is a recipe I will repeat time and time again as they are super versatile, and more importantly addictive delicious.


Roasted Red Peppers
Inspired by My Berlin Kitchen
Recipe adapted from The Wednesday Chef

Ingredients
4 Whole Red Peppers, washed

Preheat oven to 375. Place whole peppers on their side on a foil lined baking sheet. Bake for a total of 60 minutes, turning the peppers to a new side every 20 minutes. I baked my peppers a little longer, ensuring that they were very dark upon removal from oven.

Let peppers cool on baking sheet for 30 minutes, then peel the skin off of the peppers. The skin should peel right off. Eat immediately, but will keep for 5 days in the refrigerator.

12.29.2012

Back at It- Finally!

I promised to be back to blogging after my wedding, and I didn't come back. Then I made several attempts of setting deadlines for myself to be back at it- you know, after the family vacation, after a major job switch, after my birthday- you know the drill. Finally though, I realized that I missed blogging terribly and needed to have it back in my life. I'm hoping to be more regular with posting, and am super excited to really put my new DSLR to use. It was a wedding present to myself, and has gone very unused, much to my dismay. Typically I forget I even have it, which is quite awful. I plan to move it to a spot in my house that is much more in eyesight so that I never forget to pull it out when cooking.

Thankfully, I was still cooking and using all of my lovely shower and wedding gifts during my long absence, which means that my skills have not diminished, but rather, improved. I'm super excited to be back at sharing my meals with a bigger community!

Sidebar to all of this- while I do plan on posting more regularly, I also plan on broadening this blog's focus to include more aspects of my life. While I do love to cook and chat about it, I feel that it is probably better to keep the scope of my blog space a little wider which will allow me to discuss many different topics. There have been quite a few changes in my life, and I would love to write about my ever evolving situations, and how I try to cope with them, and use food as a method to both relieve stress, and provide community for others.

Without further ado, here are a few things that I've done in the past 6 months.

Visited family in Atlanta- This is my cousin's wife, me, and a few of her friends at Sweetwater Brewing Company

Loads of carrots from our garden this summer. Surprisingly, the carrots grew extremely well in our crazy New England weather

Using up lots of chard from our garden to make a delicious baked chicken and chard dinner courtesy of Martha Stewart Living magazine.

The first of many, many batches of Christmas cookies.

Meet Porter, our new puppy aptly named after my favorite style of beer. We now have both a beer and a cheese dog.

Camping in Freeport, Maine with the dogs.

Jack and me on our wedding day at the winery where we held our reception

Took part in my very first Reach the Beach relay in New Hampshire with my new co-workers.

My husband (eek!), and me on our annual vacation at the New Jersey shore with my family

This is a picture of the cake table at our wedding and the 18 cakes that Jack and I made for our guests.


5.17.2012

OXO Giveaway Winner

Goodness it has been a while! I apologize for the long delay in announcing the winner of the OXO giveaway, however life and work have both been a little crazier than normal.

So without further ado, using Random.org, I picked the winner of the giveaway! Comment #4, Ashley,who mentioned a Yoshi Blade has won the giveaway! Please contact me with your mailing information to receive the generous gift from OXO.


In the meantime, in light of my busy schedule, and my wedding that will be occurring in 3 weeks, I am going to take a break from blogging, and will be back in late June. Don't worry though, I will still be cooking and baking. In fact, I just baked 20 cakes for our wedding last weekend! Hope everyone has a great few weeks!

4.27.2012

OXO Giveaway!

Whoever told me getting married was easy, was clearly incorrect, or had a wedding planner. I have been swamped with both a new job at work and with planning our upcoming wedding (6 weeks away! Eek!). Unfortunately, I have not even had a chance to blog about anything that I have been up to, including trying out all of the new kitchen toys I received at my shower! I have certainly been in the kitchen though, making tiered birthday cakes, peanut butter eggs, and Easter dinners, but have not even had a moment to even take a picture of anything I have been doing. Yikes!


Recently though, I was given the opportunity to test out OXO brand locking storage containers. I have always been a huge fan of OXO and all of their products. In fact, all of the utensils and some of the kitchen gadgets I registered for my wedding were OXO. Everything they make has been tested countless times for quality, durability, and most importantly, effectiveness, so when given the chance to review the containers, I knew I was in for a treat!


The containers were sent in 3 different sizes, one medium sized, one smaller sized, and one that was appropriately sized for salad dressings and any other condiments. As a daily lunch packer, I was so happy to see that I would be testing out the perfect storage piece for my salad dressings! I have come home to many lunch boxes saturated in vinegarettes and Cesar dressings, which always make for a miserable me. The OXO containers did not leak at all though, and I am pleased to report that I will be making the switch to them entirely, especially because they are BPA free.


As a thank you for my testing, OXO has given me an additional set of locking containers to give away. To enter to win, please post a comment on my blog about your favorite kitchen gadget by Friday, May 11. Using a random number generator, I will choose and contact the winner. Good Luck!

3.20.2012

Homemade Bagels

Recently, I have started to try to make a few recipes that are a little on the challenging side for me- homemade marshmallows, vegetarian meals as I have given meat up for Lent, and this recipe for bagels. When I started to see a lot of fellow bloggers in the blogosphere attempt bagels successfully, I decided that it was time to get over my fear.


Of course, being a little bit crazy, I decided to make bagels for the first time, and bring them for my swap item at one of the Boston Food Swaps. Daring, yes, but isn't that what sharing food with complete strangers is? Either way, these bagels turned out fantastically! They were much easier to make than I had originally thought, much like marshmallows, and I even had a lot of fun poking the holes in them and swinging them around my finger.


I highly suggest making the bagels on a free afternoon. Even better, pair with some cinnamon honey butter or homemade jam.


Simple Bagels
from King Arthur Flour

Starter
1/2 cup (2 1/8 ounces) King Arthur Unbleached Bread Flour
1/4 cup (2 ounces) cool water
pinch of yeast

Dough
4 cups (17 ounces) King Arthur Unbleached Bread Flour
1 1/4 cups (10 ounces) cool water
1 3/4 teaspoons salt
1 1/2 teaspoons instant yeast

Water bath
water to fill a 10"-diameter pan about 1" deep
1 tablespoon non-diastatic malt powder or brown sugar

Combine the starter ingredients in a medium-sized bowl, cover, and let rest at room temperature overnight.

Next day, combine the puffy starter with all of the dough ingredients and knead—by hand, electric mixer, or bread machine—to form a stiff but not dry dough. Place the dough in a lightly greased bowl, cover, and set it aside to rise for 1 hour. Gently deflate the dough, and let it rise for another 30 minutes.

Transfer the dough to a work surface, and divide it into 12 pieces. Roll each piece into a smooth, round ball. Cover the balls with plastic wrap, and let them rest for 30 minutes. They'll puff up very slightly.

While the dough is resting, prepare the water bath by heating the water and malt (or sugar, which I used) to a very gentle boil in a wide-diameter (about 10") pan. A 10" electric frying pan works well here. Preheat your oven to 425°F.

Use your index finger to poke a hole through the center of each ball, then twirl the dough on your finger to stretch the hole until it is about 2 inches in diameter (the entire bagel will be about 3 ½" across). Be careful as it is easy to fling the bagel off of your finger. Place each bagel on a lightly greased or parchment-lined baking sheet, and repeat with the remaining pieces of dough. Be sure to grease or use parchment. I did not and ruined a baking sheet.

Transfer the bagels, four at a time if possible, to the simmering water. Increase the heat under the pan to bring the water back up to a gently simmering boil, if necessary. Cook the bagels for 2 minutes, flip them over, and cook 1 minute more. Using a skimmer or strainer, or the end of a wooden spoon, remove the bagels from the water and place them back on the baking sheet. Repeat with the remaining bagels.

Bake the bagels for about 25 minutes, or until they're as deep brown as you like. To top with seeds, remove them from the oven after about 15 minutes, spray with water or Quick Shine, and sprinkle with seeds. Return to the oven to finish baking. Remove the bagels from the oven, and cool completely on a rack.

2.28.2012

February Foodie PenPal Reveal!

During early February, I stumbled across a blog post from a fellow blogger that detailed a foodie penpal group, and gifts she had received from her penpal. Also in the blog post was a link to the organizer of the event, and the opportunity to participate. As soon as I saw that I could join, I jumped for joy! I love a surprise package in the mail, and if I can send one to someone else, even better!


The premise of the event is that you are assigned both a blogger to send treats to, as well as someone you will receive treats from. You exchange information, food allergies, and anything else important, send the packages by the 15th of the month, and then blog about what you received. While there are no strict guidelines on what to send, the gifts should stay under $15 total, which makes this a super affordable event to participate in.


I was super excited to receive my package in the mail from Lindsay, and fortunately for me, it arrived about 5 minutes before I was to go away for a weekend. I opened it immediately, and saw a giant cookie that was waiting to be eaten. It was both gluten free, and delicious! The rest of the box contained a variety of granola bars and gourmet nut butters. It was a box made for someone like me! My favorite surprise was a jar of Biscoff spread that is so addicting!


This was so fun to take part in, and I will definitely be doing it again in March. If you would also like to join the fun, here's the deets:

If you’re interested in participating for March, please send an email to Lindsay at theleangreenbean@gmail.com and include the following information:
-Your full name
-Your email address
-Your blog name/address
-Your twitter handle (if applicable)
-WHETHER YOU ARE A US RESIDENT OR CANADIAN RESIDENT

Email Lindsay by March 4th if you would like to participate.

2.14.2012

Bulgur and Chickpea Salad and Roslindale Community Kitchen

My neighborhood, Roslindale, has started this great community kitchen that meets monthly. I have only been able to attend one session, but the basic gist is that a group of about 15 people get together, bring ingredients for a specific recipe, and cook together. When all have finished cooking, the dishes are divided amongst the attendees, so everyone goes home with a whole host of meals. This worked really well for me as my fiance is out of town during the week, and as such, my desire to cook for one dwindles.


At this event, I was introduced to Bulgur and Chickpea salad. I have seen dishes like it, such as tabbouleh, but had never tried this variety. After watching fresh parsley being chopped, and smelling the mix of garlic and lemon juice, I knew that I had to try this recipe at home- one portion wouldn't be enough for me!


The recipe is super simple, makes enough for 4-6 people, and tastes even better on days 2 and 3, making it ideal for leftovers and lunches. Most of the non perishables will probably be stocked in your pantry already, so the salad is great for weeknight meals as well.


If you would like more information about the Roslindale Community Kitchen, hop on over to Greening Rozzie's website for details. It's really a great concept, so if your neighborhood does not have one, start one!


Bulgur and Chickpea Salad

Ingredients
1 cup fine or medium ground bulgur- this can be found in the bulk section of grocery stores
2 garlic cloves, crushed
juice of 3 lemons
salt and pepper
7 tablespoons EVOO (adjust to taste, I used a little more)
1 14 oz can chickepeas, drained
3.5 cups loosely packed flat leaf parsley
1 cup loosely packed mint leaves

Soak the bulgur in lots of cold water for 20 minutes, or until tender. Drain and squeeze out excess water. In a bowl, mix together the garlic, lemon juice, S&P, and EVOO. Soak the drained chickpeas in this mixture for 10 minutes, and then stir in the bulgur. Mix in the parsley and mint when ready to serve.

1.17.2012

Happy Birthday Pupcakes!

I never thought I would be one of those crazy dog owners that talk to their dog, take the dog everywhere, and make the dog a birthday cake. Then again, I never liked to cook before either...


In addition to it being my dog, Gorgi's (short for Gorgonzola), second birthday, it was also his first "adopt-o-versary," which meant that his treat had to be extra special. I perused a few websites with homemade dog treats, cupcakes, and cakes, and finally settled on this one because it did not have peanut butter. Of course, I would have a dog that does not like peanut butter.


The recipe is super simple to throw together, and is almost a twist on a cheddar apple biscuit, sans the cream cheese frosting. Gorgi LOVED the pupcakes, and I loved to watch him eat them! Unfortunately, he devoured them too quickly for my camera to catch.

Happy Birthday Pupcakes
adapted from here
*note that I halved this recipe and ended up with about 9 pupcakes

Ingredients
½ teaspoon of baking soda
½ cup plain yogurt
½ cup water
1 large apple
1½ cups whole wheat flour
¼ cup oatmeal
2 teaspoons of baking powder
¼ cup vegetable oil
2 tablespoons of honey
2 eggs
1 cup grated cheese

Frosting:
1-8oz low fat cream cheese such as Philadelphia
2 tablespoons plain yogurt
2 tablespoons of honey
Dog Biscuits for decoration- I used Milkbone

Preheat oven at 375 degrees and grease muffin tins, if necessary.

Core, slice and finely dice the apple and set aside.

Mix flour, oatmeal, baking powder and baking soda together in a large mixing bowl.

Blend the yogurt, water, oil, honey and eggs together and then stir in the cheese and apple. Add the cheese mix to the flour mixture and stir until completely mixed. Spoon into the muffin tins, filling each cup about three quarters full.

Bake for about 20 minutes

Let rest in the muffin tins for a few minutes, then remove and let sit until completely cool.

For the frosting, combine the cream cheese (at room temperature), honey and yogurt until smooth. Spread on the cupcakes. Add dog biscuits for decoration if you choose.

1.09.2012

Sauerkraut Chocolate Cake, or What to Do with Leftover Sauerkraut

I am not a believer in New Year's resolutions. I find that most people set up unrealistic expectations for themselves, only to end up disappointed. Don't get me wrong, I applaud those who are able to keep their resolutions, but for myself, I find that it is better to continually make small goals and keep working to achieve those goals. For example, I would really love to start blogging more frequently, but I also know that from now until June 9, I will be crazy busy with wedding planning, so I will not set a rigid goal until after that time.


Enough about resolutions, and onto how to use up all of the leftover sauerkraut in your fridge. Growing up in Central Pennsylvania afforded me the lovely chance to always eat pork and sauerkraut on New Year's Day. It was a family holiday and tradition. The only problem with the meal was well, no one seemed to love the sauerkraut part, so there was always a plethora of the fermented cabbage leftover.


Last week I stumbled across a chocolate cake recipe that incorporated sauerkraut, and after an initial "that can't possibly be good" thought, I decided to give it a whirl. It was this or the kraut was getting pitched in the garbage. The recipe came from a reputable source, so I believed that it would turn out well. After putting together the batter, popping it in the oven, and making the chocolate sauce, I was convinced that this would be a terrific chocolate cake.


I was not mistaken. The chocolate bundt was one of the best I have ever had, and the chocolate drizzle sauce was sensational. Come January 2nd next year, I will most definitely know what I will be doing with my leftover kraut!


Chocolate Sauerkraut Cake
from Scharffen Berger

INGREDIENTS

2/3 cup sauerkraut
½ cup SCHARFFEN BERGER Natural Unsweetened Cocoa Powder
2 cups all-purpose flour
1 teaspoon baking powder
1-1/4 teaspoon baking soda
¼ teaspoon salt
10 tablespoons unsalted butter
1-1/2 cups granulated sugar
3 eggs
1 teaspoon vanilla extract
1 cup low-fat milk- I used 2% organic milk

For the Glaze
INGREDIENTS
4 ounces SCHARFFEN BERGER 70% Cacao Bittersweet Chocolate- I used Ghiradelli 60%
4 tablespoons unsalted butter
1 teaspoon light corn syrup

PREPARATION

Preheat the oven to 325 degrees F. Butter and flour a Bundt pan. Tip- Use cocoa powder to dust the pan instead of flour for a chocolate cake

Put the sauerkraut in a bowl of cold water. Squeeze it out with your hands a few times and drain. Do not squeeze all the moisture out. Chop the sauerkraut into fine pieces.

Sift together the cocoa powder, flour, baking soda, baking powder and salt.

In the bowl of an electric mixer, cream the butter and sugar until light and fluffy.

In a separate bowl, whisk together the eggs and the vanilla. Slowly add the egg mixture to the creamed butter and sugar.

Add half the cocoa/flour mixture. Beat until well combined. Add the milk. Add the remaining cocoa/flour mixture.

Finally add in the chopped sauerkraut.

Transfer the batter to the prepared pan and bake for 45 minutes or until a tester comes out clean and the cake begins to come from the sides of the pan. Cool completely on a rack. Invert onto serving plate when thoroughly cooled.

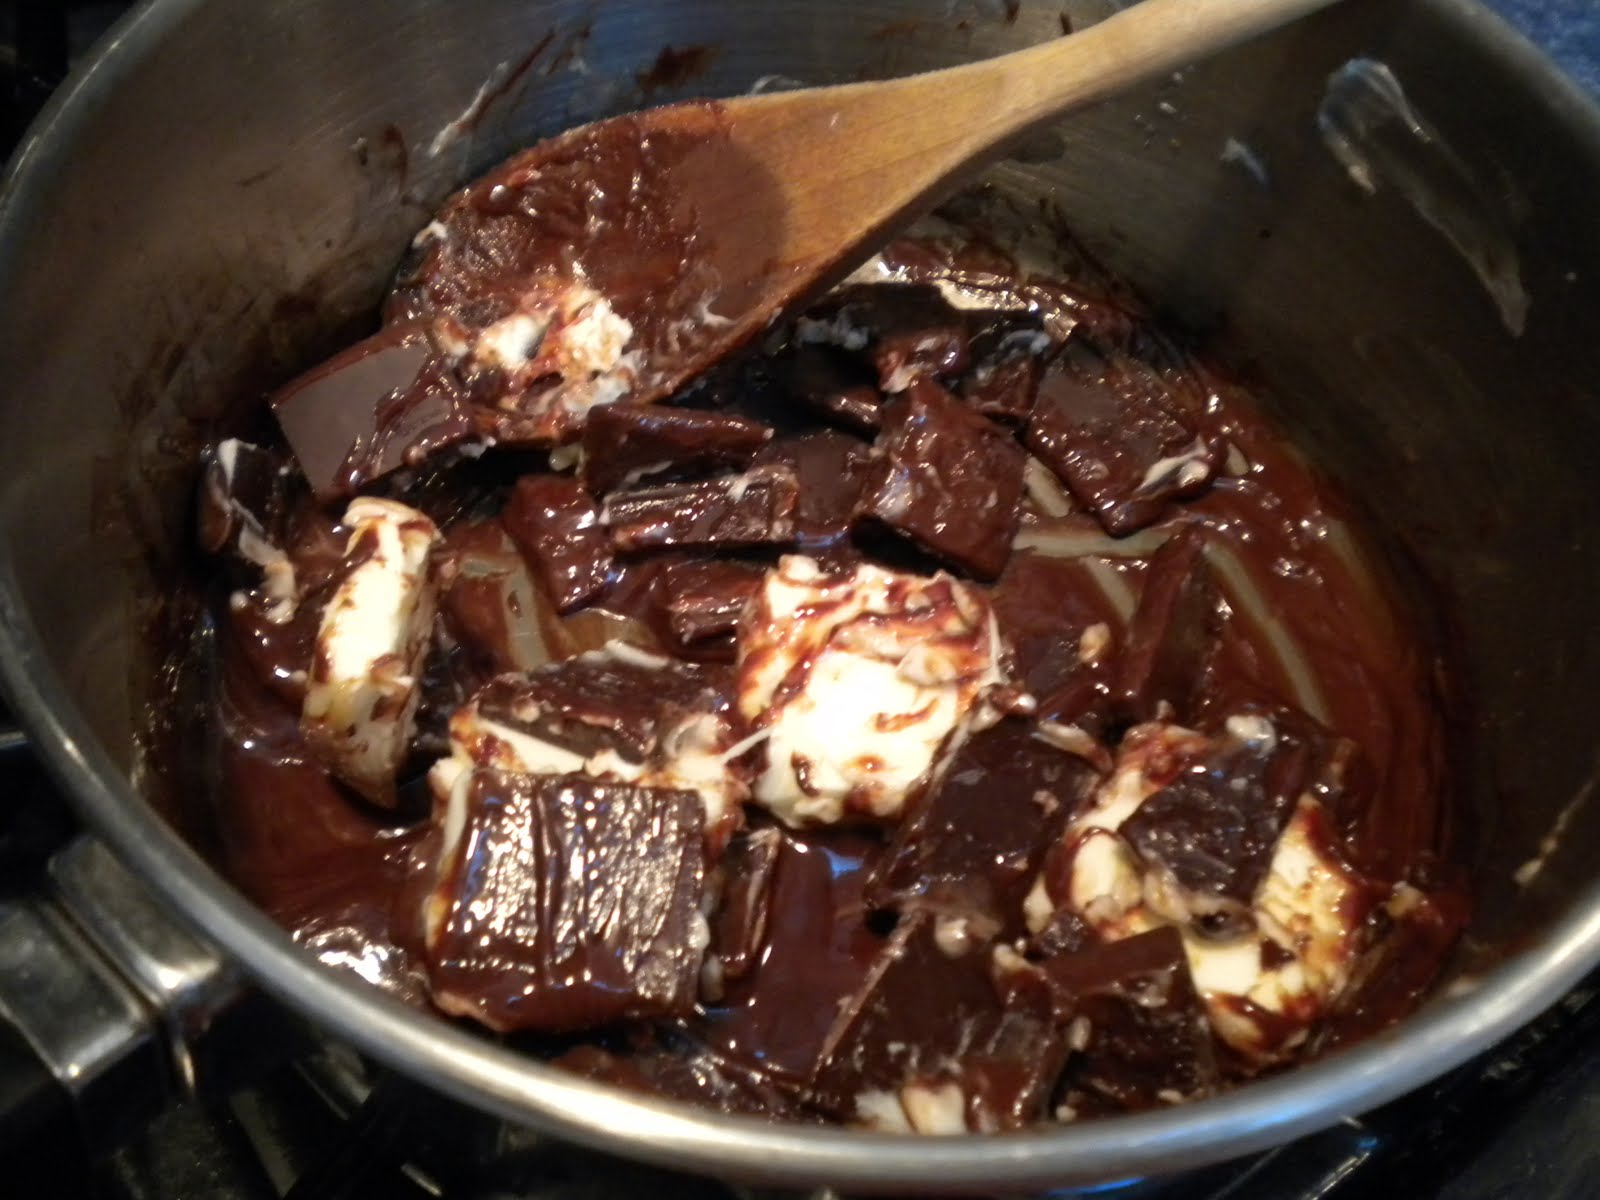
To make the glaze, combine the chocolate, butter and corn syrup in a small saucepan. Heat over medium heat, stirring, until thoroughly melted and combined. When the sauce is cooled to room temperature and is still pourable, glaze the entire cake or by piece.

12.20.2011

Chicken Tinga Tacos

With all of the craziness of the holiday season, posting has been a little lighter than normal. Fortunately, I have been cooking the entire time- Christmas cookies, a very belated Friendsgiving, and this recipe for Chicken Tinga Tacos. I have mentioned before that I subscribe to numerous cooking magazines, and in effort to put many of the recipes to use, I have made a pact to try at least 1 recipe per week from a magazine. This recipe was at the top of my list in recipes to try, and for good reasons.


The chicken tinga tacos are divine. Deliciously spicy, juicy, and seasoned well, they pair well with a slaw, some lettuce, or just on top of a salad. The recipe is very easy to prepare, and more importantly, can be made in a slow cooker if desired. I chose to follow the recipe word for word, but have had friends who made the dinner in a slow cooker. I also made it on a Sunday, and served it on a Tuesday. It actually tastes better after the first day. The recipe is a winner in my book, and I'll be using it quite frequently in the future as I have just received my first poultry share from John Crow Farms.


Chicken Tinga Tacos
from Food & Wine Magazine, December 2011

INGREDIENTS

1/4 cup plus 2 tablespoons extra-virgin olive oil
2 1/2 pounds trimmed, skinless, bone-in chicken thighs (I used boneless thighs)
Salt and freshly ground black pepper
1 large onion, thinly sliced
3 large garlic cloves, minced
One 28-ounce can diced tomatoes
2 canned chipotles in adobo, coarsely chopped (2 chipotles, not 2 cans)
1 cup chicken broth
12-24 corn tortillas
2 ounces Cotija cheese, crumbled
Sliced scallions and chopped cilantro, for garnish


DIRECTIONS

Heat 3 tablespoons of the olive oil in a large nonstick skillet. Season the chicken all over with salt and pepper, add it to the skillet and cook over moderately high heat, turning once, until browned, about 12 minutes. Transfer the chicken to a 9-by-13-inch baking dish and pour off the fat in the skillet.

Add the remaining 3 tablespoons of olive oil to the skillet along with the onion (I used the chicken drippings instead of the additional OO). Cook over moderately high heat, stirring occasionally, until the onion is lightly browned and softened, 5 minutes. Add the garlic and cook until fragrant, 2 minutes. Add the tomatoes and their juices, the chipotles and the broth and bring to a boil. Simmer over moderate heat, stirring occasionally, until thickened and slightly reduced, 20 minutes.

Preheat the oven to 350°. Transfer the sauce to a food processor and let cool for 15 minutes. Puree until smooth and season with salt and pepper. Pour the sauce over the chicken. Bake the chicken uncovered in the center of the oven for about 45 minutes, until the meat is tender and the sauce is very thick and darkened around the edges. Wrap the tortillas in foil and warm them in the oven for about 10 minutes.

Remove the chicken from the sauce and shred the meat; discard the bones. Return the chicken meat to the sauce. Spoon about 3 tablespoons of chicken onto each tortilla and sprinkle with the crumbled cheese. Garnish the chicken tacos with the scallions and chopped cilantro and serve hot.

MAKE AHEAD: The tinga can be refrigerated for up to 3 days and reheated gently.

11.29.2011

Lavender Shortbread

I have always been curious about edible flowers. I've seen them, heard of them, but have never eaten them, until now. A few weeks ago, at my local farmer's market, I came across lavender buds, and knew that I had to have them.


Lavender is typically used in fragrances, candles, and cleaning products. I would guess that most people are unaware that it is actually edible! I decided to purchase the purple flower and try it out in some shortbread cookies. Coincidentally, Joy the Baker had blogged about lavender cookies a few weeks before I had bought some, and decided I would use her take on the cookie.

The dough was easy to work with, smelled delicious, and tasted even better. These are the perfect tea cookies, and give your mouth a lovely feel and taste! I will most certainly be making them again, as they make me feel quite sophisticated and feel as though I could easily fit in among the British :)


Lavender Cookies
adapted from Joy the Baker

1 tablespoon dried lavender blossoms

1/2 cup plus 1 tablespoon raw turbinado sugar- I used granulated sugar for the cookies, but turbinado for the topping

1 cup (2 sticks) unsalted butter, at room temperature

2 1/2 cup all-purpose flour

1/4 teaspoon salt

1 eggs, beaten (for egg wash)

extra sugar for sprinkling on top (I used turbinado)

In a medium bowl, whisk together flour and salt. Set aside.

In a small spice grinder to grind up 1 tablespoon lavender and 1 tablespoon sugar. You could also use a mortar and pestle to grind the sugar and lavender together.

In the bowl of an electric stand mixer, fit with the paddle attachment add butter, ground lavender mixture, and remaining 1/2 cup sugar. Cream on medium speed until slightly more pale and fluffy, about 3-5 minutes. There will still be raw sugar bits floating around. Add the flour. Mix on low speed until dough comes together. The dough will be crumbly, then begin to form when it continues to mix- about 5 minutes. Dump dough mixture out onto a clean surface and form into a ball with your hands. Shape each ball into a tube. Wrap in plastic wrap and refrigerate for at least 30 minutes.

Line cookie sheets with parchment paper. Set aside.

Grab the dough out of the refrigerator, and slice into 1/4 inch slices. Use a fork to prick the tops of the cookies. Brush very lightly with egg wash and sprinkle with sugar. Refrigerate cookies while oven preheats.

Place racks in the center and upper third of the oven. Preheat oven to 350 degrees F. When oven is preheated, bake cookies for 8 to 11 minutes, until just browned around the edges. Mine erred on the 8 minute side. Remove from oven. Allow to cool on the cookie sheet for 10 minutes then remove to a wire rack to cool completely.

Cookies last, in an airtight container at room temprature, for up to 4-5 days.

11.08.2011

Baked Eggs with Sauteed Mushrooms & Spinach

In my home, eggs are typically a breakfast food or included in any baked good. They are not, however, often served at dinner, with vegetables. I was intrigued by a recipe in Food & Wine in the October issue that highlighted an egg dish made with spinach and mushrooms, and decided to try and incorporate it into one of our weekly meal plans.


At first, I could not understand why someone would want eggs at any other meal besides breakfast, but after devouring this delicious dinner, I totally get it. Eggs are meant for dinner too. The combination of wine soaked mushrooms and a sauteed kale (spinach if you'd like), is heavenly, and paired with some sunny side up eggs, the meal turns into a real winner. Additionally, this meal is quick to make, so it's a perfect weeknight dinner!


Food & Wine magazine has truly wowed me with their last few issues. I am certainly glad that I subscribe to it now, and most definitely will in the future, as long as the recipes are this great. Unfortunately, this will also mean my stack of magazines will not diminish any time soon. Any suggestions for keeping recipes from magazines in a more organized, less space taking way?


Baked Eggs over Sauteed Mushrooms & Spinach
adapted from Food & Wine Magazine

Ingredients
1 tablespoon olive oil
1 large leek, white and light green parts only, cut into 1/2-inch pieces- I used an onion
1 tablespoon unsalted butter
1 pound white or cremini mushrooms, thinly sliced (about 6 cups)
1 tablespoon soy sauce
1/4 cup dry red wine
5 ounces baby spinach- I used kale
Salt and freshly ground pepper
4 large eggs
4 slices of whole-grain toast

Preheat the oven to 350°. In a deep skillet, heat the olive oil. Add the leek and cook over moderate heat, stirring, until softened, about 3 minutes. Stir in the butter and mushrooms. Cover and cook, stirring occasionally, until the mushrooms are softened and most of the liquid is released, about 7-10 minutes. Uncover and add the soy sauce and red wine and cook over moderately high heat, stirring, until the liquid is reduced to 2 tablespoons, 5 minutes. Add the spinach (kale) and stir until wilted, 2 minutes. Season with salt and pepper.
Coat four 1-cup ramekins or small gratin dishes with oil. Transfer the mushrooms and spinach to the ramekins and crack an egg on top of each. At this step, I just kept my entire dish in my cast iron skillet, and cracked eggs on top. Bake for 10 to 12 minutes, until the white is barely set and the yolks are runny. Let stand for 2 minutes; serve with the toasts.

11.02.2011

Salted Caramels


I love salted caramels. Like LOVE. Like Super Duper LOVE them. The salty sweet combination is not only melt in your mouth delicious, but also addictive. Thankfully, this recipe makes more than I can possibly eat. I think.


I have never made salted caramels, and frankly did not want to even try to make them for fear of overeating them. This all changed when I received my swag bag at the Boston Brunchers Birthday Bash. The lovely little swag bag contained two different, beautiful cookbooks. One of them, the new Cook's Illustrated book, which hasn't even been opened yet,and the other, Salty Sweets, just begged me to open it. I have since made two recipes from this book, and both are extraordinary.


As soon as I turned to the Salted Caramels page, I knew I would be making them. I had some heavy cream waiting to be used, and a sweet tooth that needed to be satisfied. So my caramel making adventure began.


Caramel making can be tricky, and more importantly, the cook needs to always keep an eye on the hot liquid so that it does not burn. The directions in the book are very helpful, and ensure that the caramel will turn out well. A few words of caution though: always where shoes when making caramel in case the liquid splatters, keep stirring the pot to ensure even heating, and be prepared when the caramel bubbles profusely when the heavy cream mixture is added.


Overall, this recipe was very easy to make, as long as precautions are taken, and a careful eye is always on the pot. I suggest that you try it too! You'll love it, and more importantly, never have to buy caramels again!


Salted Caramels
from Salty Sweets, by Christie Matheson

1 cup heavy cream
5 tbsp unsalted butter, cut into pieces
1/2 tsp pure vanilla extract
1 tsp fine sea salt
1.5 cups sugar
2 tbsp light corn syrup
1/4 cup water
1 tsp fleur de sel

1. Line the sides and bottom of an 8 inch square baking dish with parchment paper. Lightly butter the parchment
2. Combine the sea salt, butter, cream and vanilla in a small saucepan, and bring to a boil over medium heat. Boil the mixture for roughly 4 minutes, and then remove from heat and set aside.
3. In a heavy medium sized saucepan (err on the larger side), combine the sugar, corn syrup, and water and bring to a boil over medium heat. Stir the mixture until the sugar is dissolved completely. Once the sugar is dissolved, boil without stirring- swirling the pan occasionally to keep the mixture cooking evenly- until it is a light amber color and the candy thermometer reads 340 degrees F. This should take about 7 minutes.
4. Turn the heat down to medium low, and carefully stir in the cream mixture. The addition of the cream will make everything foam a lot, so be prepared. Simmer the caramel, stirring often, until the it is 246 degrees F on the candy thermometer, about 6-8 minutes. The temperature may hover in the 200 to 220 range for a while, and then it will start to increase pretty quickly, so watch it carefully.
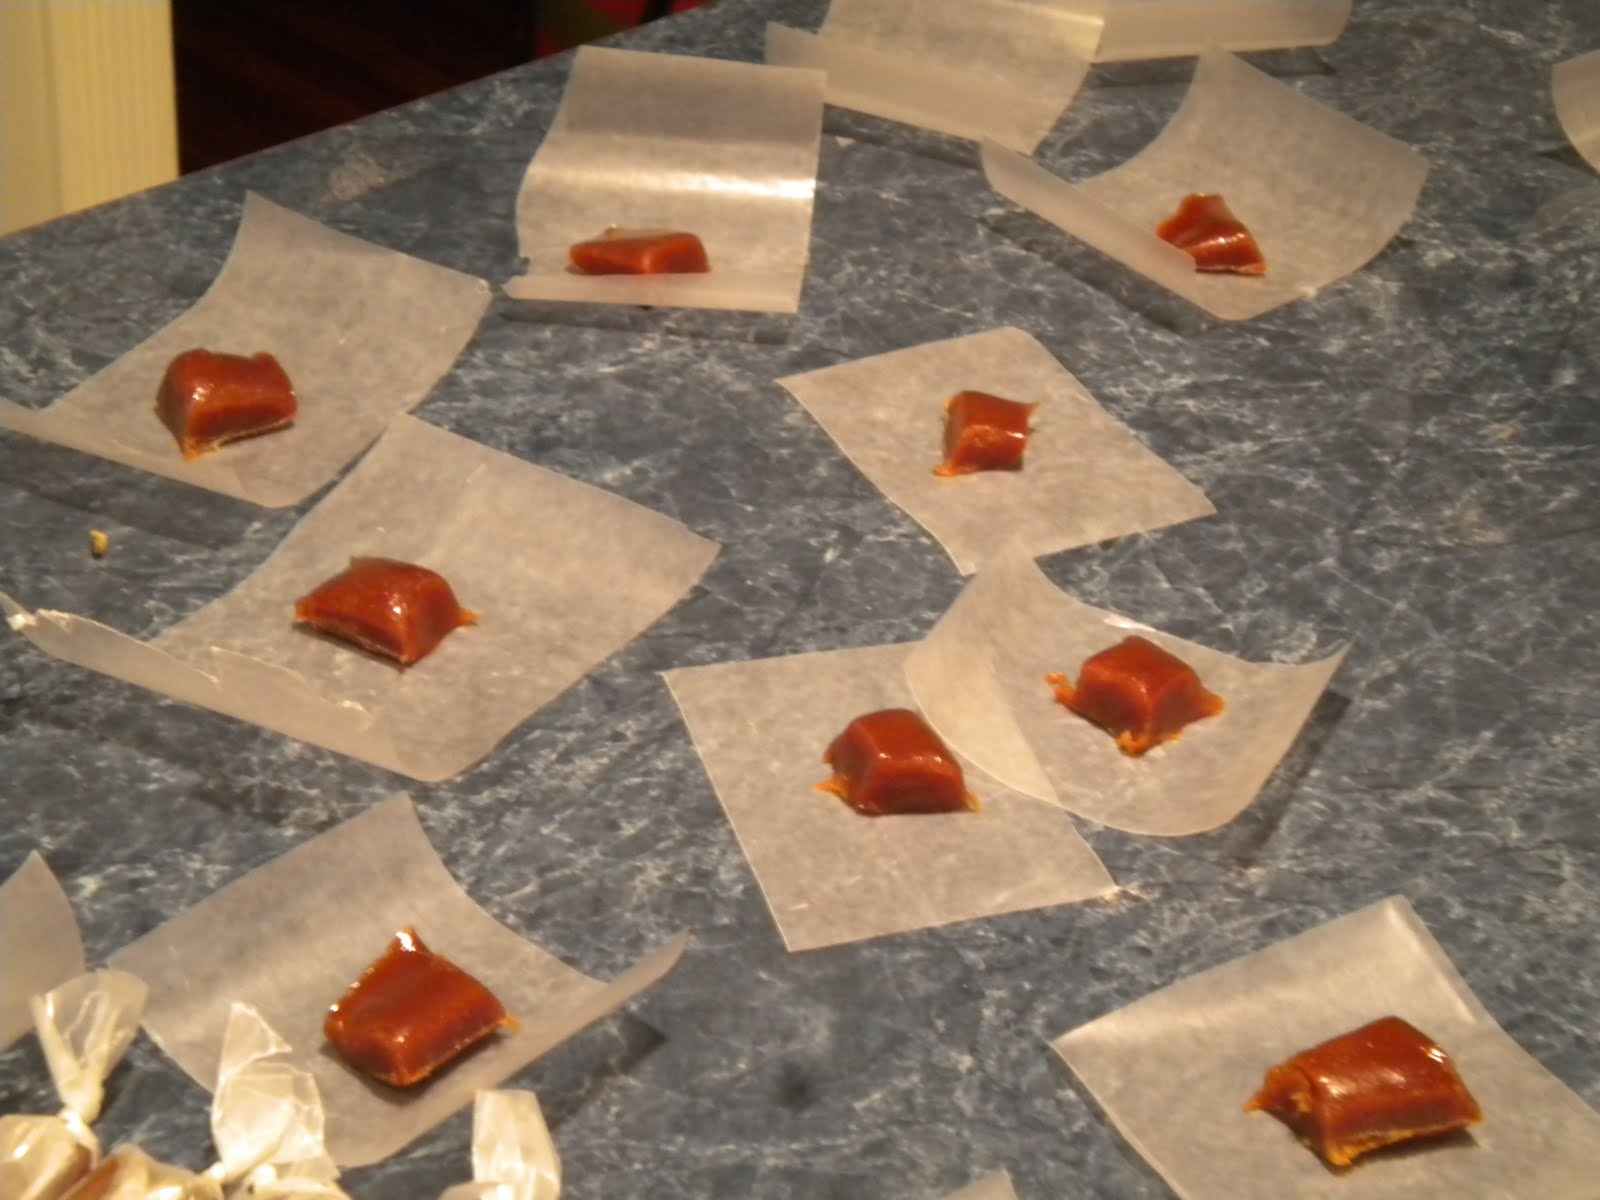
5. Stir in the fleur de sel, then pour the caramel into the prepared baking dish. Do not scrape the saucepan or you might get some burned bits that might be stuck to the bottom. Let the caramel cool for at least 3 hours. Cut the carmel into 1 inch squares and wrap each square in waxed paper or aluminum foil. The caramels will keep in an airtight container at room temperature for up to 1 week.

10.27.2011

Butternut Squash, Caramelized Onions and Blue Cheese Focaccia

Have you ever made focaccia? It's kind of a cross between a Sicilian bread crust and flat bread. The bread is made just like any other yeasted bread, and involves rising time, punching it down, and a second rise. Unfortunately, I do not get to make it as often as I would like, but recently I had the time to make it, and create a very seasonal focaccia pizza!


The dough is super easy to make, and more importantly, can be flexible to your schedule. I made the dough in my KitchenAid mixer (though I am sure you could do it in a food processor), and let it rise for about 4 hours, instead of the 2 hours instructed in the recipe. The reason for this being that my home is a little cooler, and I was gone during that 4 hour period. After arriving home, I stretched out the dough to fit a cookie sheet, placed it on it, and let the dough rise for a second time, which lasted about 2 hours.


I decided to top the focaccia with some seasonal veggies, including butternut squash and caramelized onions. I lasted put on some Great Hill Blue Cheese from Marion MA. If you have never tried Great Hill Blue, you definitely should. The cheese is terrific with a great balance of flavors that is not overpowering to first time blue cheese eaters.

After about 30 minutes, which seemed like an entirnity due to the delicious smells coming from the oven, I had myself a beautiful focaccia pizza! The crust and toppings tasted amazing together, and I will definitely be using this recipe again.


Rosemary and Olive Oil Focaccia Bread
Adapted from Flour Cookbook

1 3/4 cup warm water (about 110 degrees)
1 tsp active dry yeast
3 1/2 cup All Purpose flour
1 1/4 cup bread flour
3 tsp kosher salt
2 Tbs sugar
3/4 cup olive oil- I used less on the top of the focaccia as it seemed like a lot.
Cornmeal
2 Tbs Rosemary, roughly chopped- I used Thyme as that is what I had on hand

Combine the water and yeast together in the bowl of a standing mixer, and allow the yeast to start to dissolve, about one minute. Add the flours to the yeast mixture, 1 tsp of the salt, and sugar and turn the mixer on low, allowing the dough hook to bring the whole thing together. When the dough is a shaggy ball slowly drizzle 1/2 cup of the olive oil into the bowl. Continue to knead the dough with the mixer until it is a smooth ball - 4-5 minutes on a low speed. When the dough is smooth, turn the dough ball into an oiled smooth bowl. I use the same bowl- just take the dough ball out, spray with olive oil, and place back in. Cover the bowl with a lightly oiled piece of plastic wrap and let it rise somewhere warm (70-80 degrees) until doubled in volume, about 2 hours. For a cooler house, the rising will take longer. Once the dough has risen, turn it out onto a 10"x15" cookie sheet spread with cornmeal. Stretch the dough until it fills the cookie sheet and poke it with your fingertips. Brush the top of the focaccia dough with the 1/4 cup of olive oil (I used less) and sprinkle the salt and rosemary (sage) on top. You can put toppings on it now if you would like, or bake plain. Bake the focaccia at 425 degrees Fahrenheit for 30-40 minutes, until golden brown and puffed.